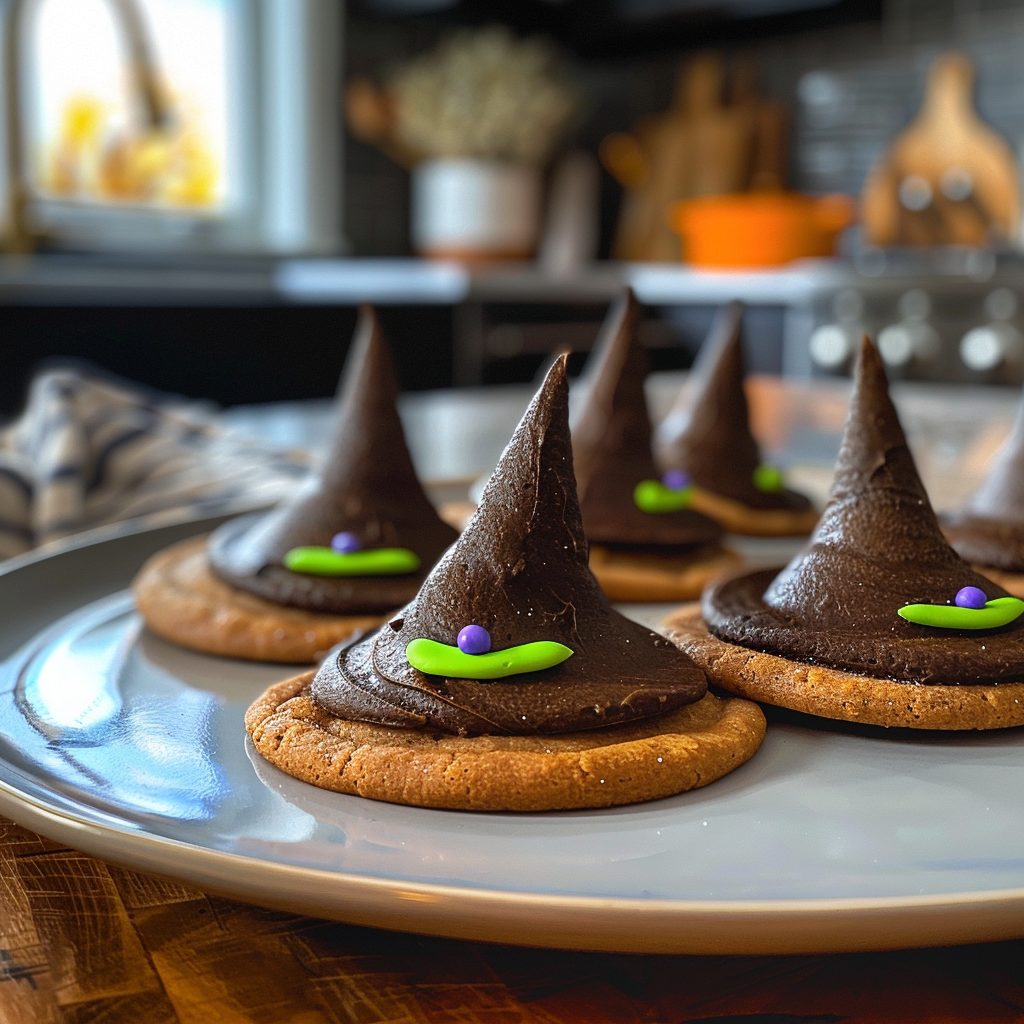
The aroma of freshly baked cookies wafts through the air, a delightful invitation that makes your taste buds dance. Picture this: crisp edges, soft centers, and whimsical witch hats that are as fun to make as they are to eat. festive Hocus Pocus punch These Witch Hat Cookies will not only tickle your palate but also bring joy to every gathering.
Remember that Halloween when you wowed your friends with your baking skills? Well, these cookies are the perfect way to recreate that magic. With their playful design and delicious flavor, they’re ideal for spooky celebrations or just a fun treat on an ordinary day. ghostly yogurt parfaits Get ready for a flavor experience that will leave you spellbound!
Why You'll Love This Recipe
- These Witch Hat Cookies are incredibly easy to prepare, making them perfect for bakers of all skill levels
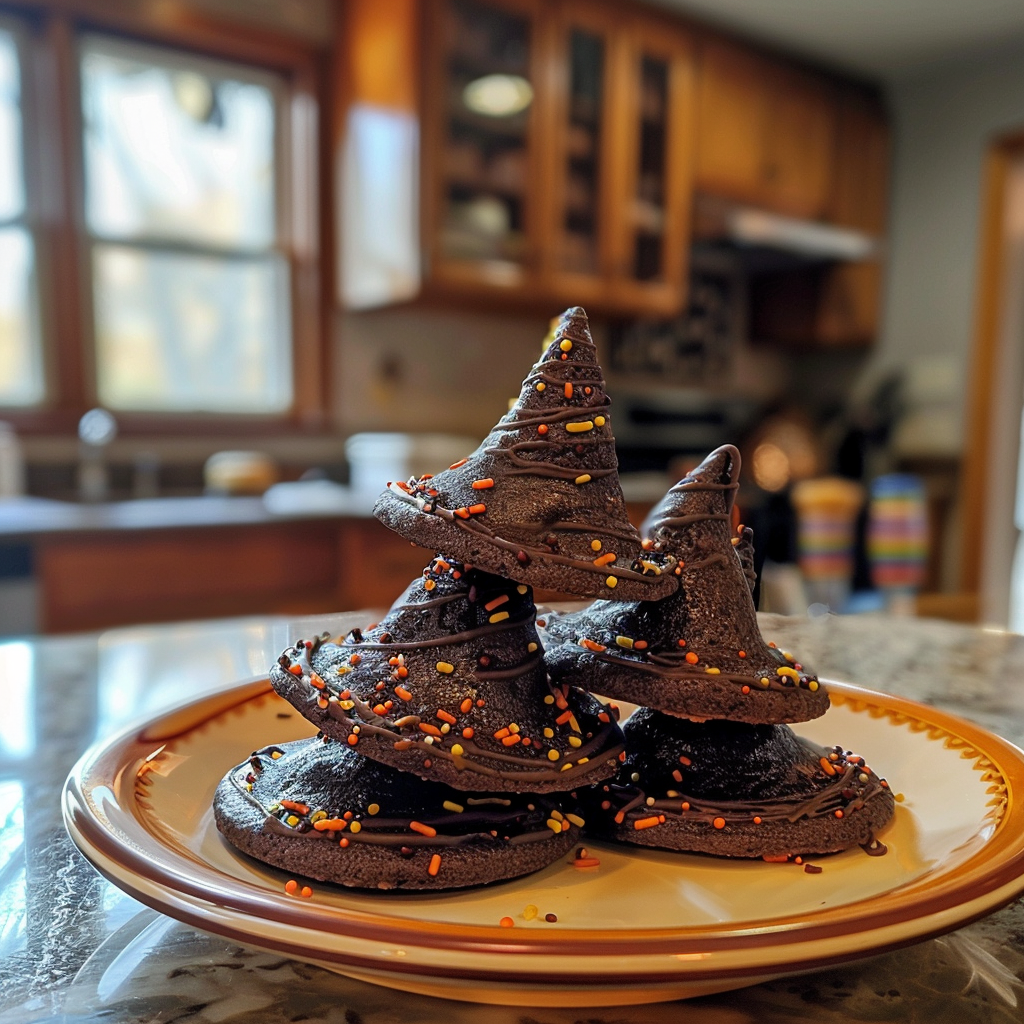
- Their rich chocolate flavor combined with vibrant colors makes them visually stunning
- Ideal for Halloween parties but versatile enough for any festive occasion
- Plus, they’re a delightful treat that both kids and adults adore!
Baking Witch Hat Cookies always reminds me of the time I surprised my kids with a batch right before Halloween. spooktacular Halloween smoothie bowls Their faces lit up like jack-o’-lanterns when they saw those adorable hats!

Essential Ingredients
Here’s what you’ll need to make these delightful cookies:
-
All-Purpose Flour: This is the base of your cookie dough; sifting it helps achieve a light texture.
-
Cocoa Powder: Use unsweetened cocoa powder for that rich chocolate flavor every cookie needs.
-
Baking Soda: This helps the cookies rise and gives them a lovely chewy texture.
-
Salt: A pinch enhances the flavor of the cookies; don’t skip it!
-
Unsalted Butter: Make sure it’s softened to room temperature for easy mixing.
-
Sugar: Granulated sugar is essential for sweetness and texture—whip it well with butter!
-
Eggs: They bind everything together; you’ll need one large egg for this recipe. Frankenstein Rice Krispie treats.
-
Chocolate Chips: Semi-sweet or dark chocolate chips add richness and gooeyness.
-
Waffle Cones: These are the secret ingredient that transforms ordinary cookies into magical witch hats!
-
Chocolate Frosting: Use store-bought or homemade; it’s what holds those cones in place.
-
Candy Corn or Sprinkles: For decoration, choose whatever adds a pop of color you desire!
The full ingredients list, including measurements, is provided in the recipe card directly below.
Let’s Make it together
Prepare Your Oven and Baking Sheet: Preheat your oven to 350°F (175°C). Line a baking sheet with parchment paper to prevent sticking during baking.
Create Your Cookie Dough Base: In a large bowl, cream softened butter and sugar together until fluffy and light in color. Add in the egg and mix thoroughly until well incorporated.
Add Dry Ingredients Together: In another bowl, whisk together flour, cocoa powder, baking soda, and salt until combined. Gradually add this mixture into your wet ingredients while stirring gently.
Shape Your Cookies: Scoop tablespoon-sized amounts of dough onto the prepared baking sheet, spacing them about two inches apart. Flatten slightly with the back of a spoon before baking.
Bake Until Perfectly Chewy: Bake in the preheated oven for 10-12 minutes or until edges look set but centers remain soft. Let them cool on the sheet before transferring them to a wire rack.
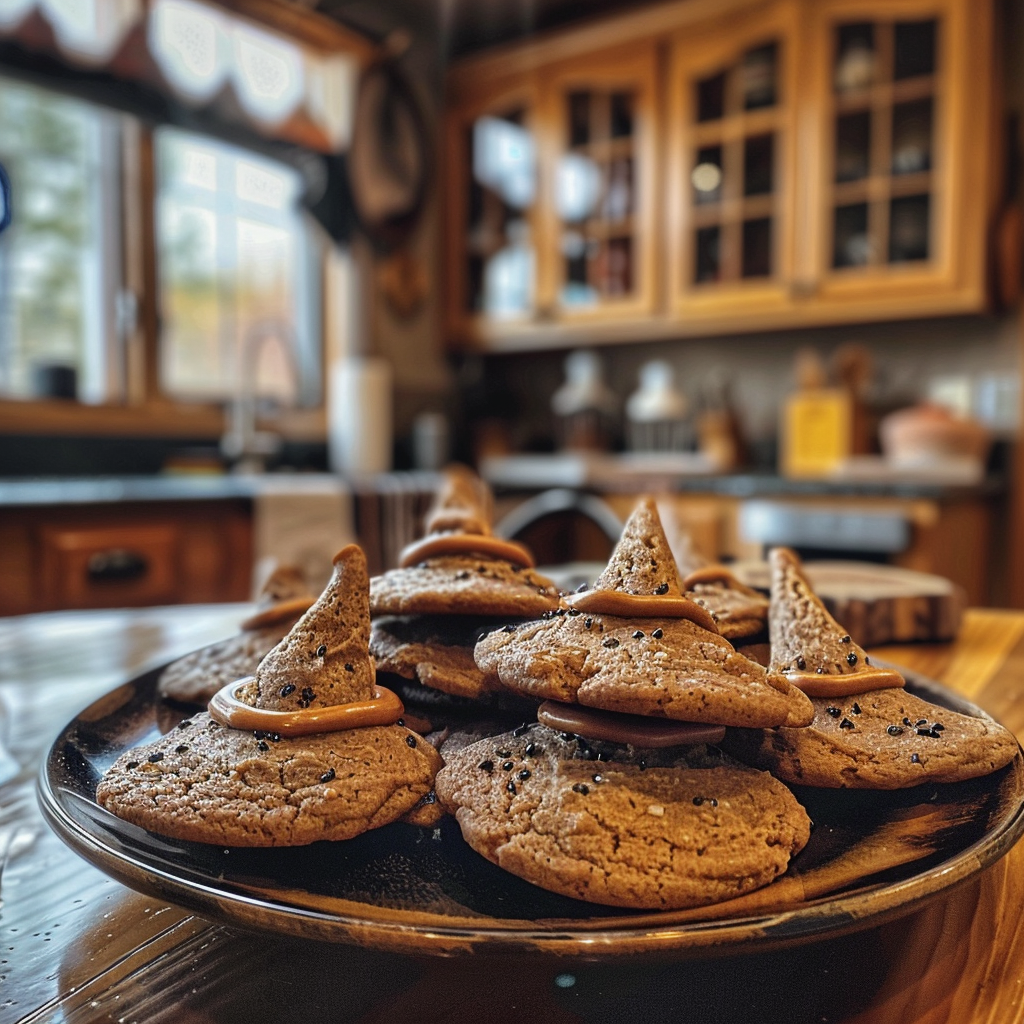
Add Witch Hats!: Once cooled, use frosting to attach waffle cones upside down onto each cookie. Decorate with candy corn or sprinkles at the peak of each cone for added flair!
Now go ahead and enjoy these whimsical Witch Hat Cookies. They’re sure to enchant everyone at your next gathering! For more inspiration, check out this lemon lavender cookies recipe.
You Must Know
- Witch Hat Cookies are not just adorable; they are a delightful treat for Halloween parties
- The combination of sweet chocolate and crunchy cones creates an unforgettable flavor experience
- Plus, their whimsical design sparks joy and makes baking fun for all ages
Perfecting the Cooking Process
Start by preparing the cookie dough first, then bake the cookies while you gather the decorating supplies. This sequence ensures that everything is ready for assembly once the cookies cool down.
Add Your Touch
Feel free to swap out chocolate for colored icing or sprinkles to suit your theme. You can also use different flavored cookies to add a unique twist to your Witch Hat Cookies.
Storing & Reheating
Store your Witch Hat Cookies in an airtight container at room temperature for up to a week. If you need to reheat them, pop them in the microwave for a few seconds to restore their chewiness.
Chef's Helpful Tips
- Use fresh ingredients for better flavor; stale ingredients can ruin your cookies
- Don’t overbake; check them a minute early for perfect softness
- Experiment with different cone sizes to create mini witch hats or towering ones—fun for all!
The first time I made Witch Hat Cookies, my niece said they looked like “spooky ice cream cones.” That moment made me realize how much joy baking can spread in our families!
FAQ
What type of cookie works best for Witch Hat Cookies?
Use a soft chocolate cookie recipe for the best flavor and texture.
Can I make these cookies ahead of time?
Yes, bake the cookies a day before and decorate them when ready to serve.
What should I do if my chocolate melts too much?
Let the melted chocolate cool slightly before dipping; this prevents overflow and mess.

Witch Hat Cookies
- Total Time: 32 minutes
- Yield: Approximately 12 cookies 1x
Description
Witch Hat Cookies are a delightful Halloween treat that combines rich chocolate cookies with whimsical waffle cone hats. These easy-to-make cookies will enchant both kids and adults at any spooky gathering. With a crunchy cone and sweet frosting, they offer a fun baking experience that’s sure to create lasting memories. Perfect for parties or just an ordinary day, this recipe will have your taste buds dancing with joy!
Ingredients
- 1 cup all-purpose flour
- 1/2 cup unsweetened cocoa powder
- 1/2 tsp baking soda
- 1/4 tsp salt
- 1/2 cup unsalted butter, softened
- 3/4 cup granulated sugar
- 1 large egg
- 1/2 cup semi-sweet chocolate chips
- 10 waffle cones
- 1 cup chocolate frosting (store-bought or homemade)
- Candy corn or sprinkles for decoration
Instructions
- Preheat oven to 350°F (175°C) and line a baking sheet with parchment paper.
- In a bowl, cream together the softened butter and sugar until light and fluffy. Add the egg and mix well.
- In another bowl, whisk together flour, cocoa powder, baking soda, and salt. Gradually add dry ingredients to the wet mixture, stirring gently.
- Scoop tablespoon-sized amounts of dough onto the prepared baking sheet, spacing them two inches apart. Flatten slightly.
- Bake for 10-12 minutes until edges are set but centers remain soft. Cool on the sheet before transferring to a wire rack.
- Once cooled, use frosting to attach upside-down waffle cones to each cookie and decorate with candy corn or sprinkles.
- Prep Time: 20 minutes
- Cook Time: 12 minutes
- Category: Dessert
- Method: Baking
- Cuisine: American
Nutrition
- Serving Size: 1 cookie (30g)
- Calories: 140
- Sugar: 10g
- Sodium: 90mg
- Fat: 7g
- Saturated Fat: 4g
- Unsaturated Fat: 2g
- Trans Fat: 0g
- Carbohydrates: 17g
- Fiber: 1g
- Protein: 2g
- Cholesterol: 15mg